Table of Contents
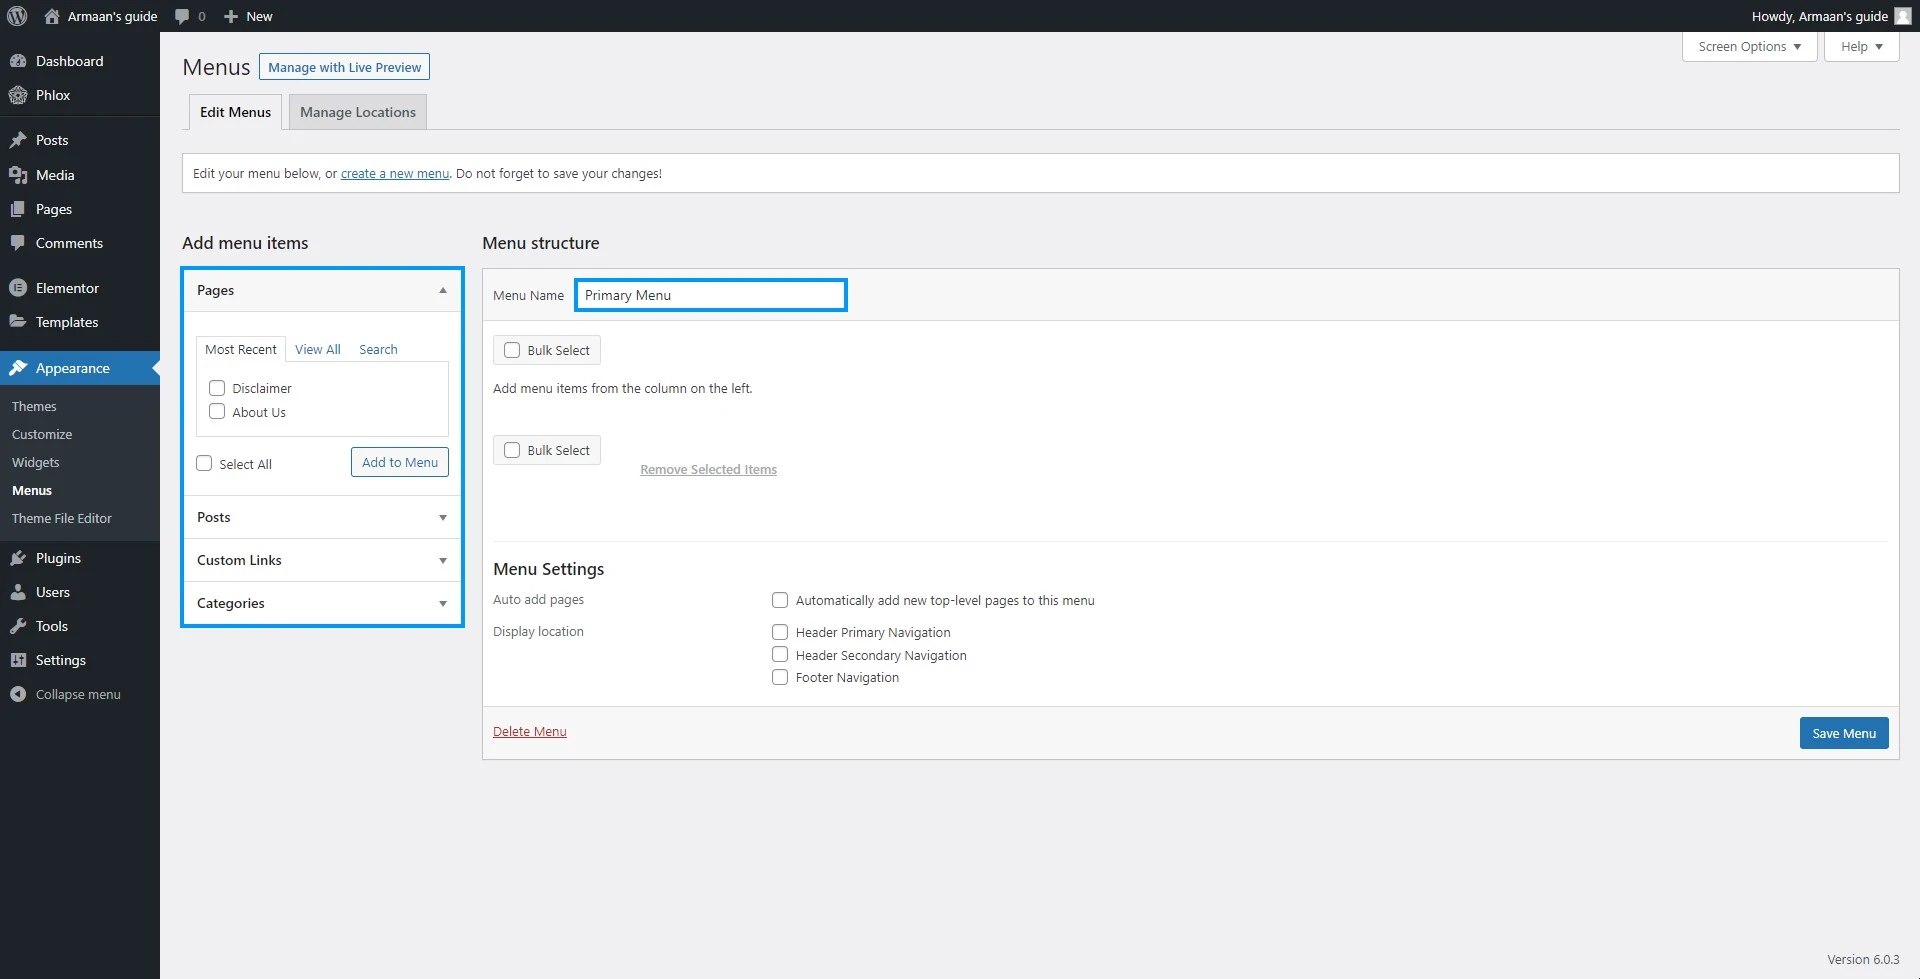
In your WordPress admin area, go to Appearance > Menus. This will open the Menus editor window. If you haven’t already made a menu, or if you select the “Create a New Menu” link.
Give your new menu a name. Our example will be called the “primary menu.” Enter a preferred name for your menu and click the Create Menu button.

How To Create A Menu In WordPress: Add Menu Items
To design your menu, choose your pages, categories, or add custom links from the left column, and then click the Add to Menu button, you can just drag and drop them according to your preference.
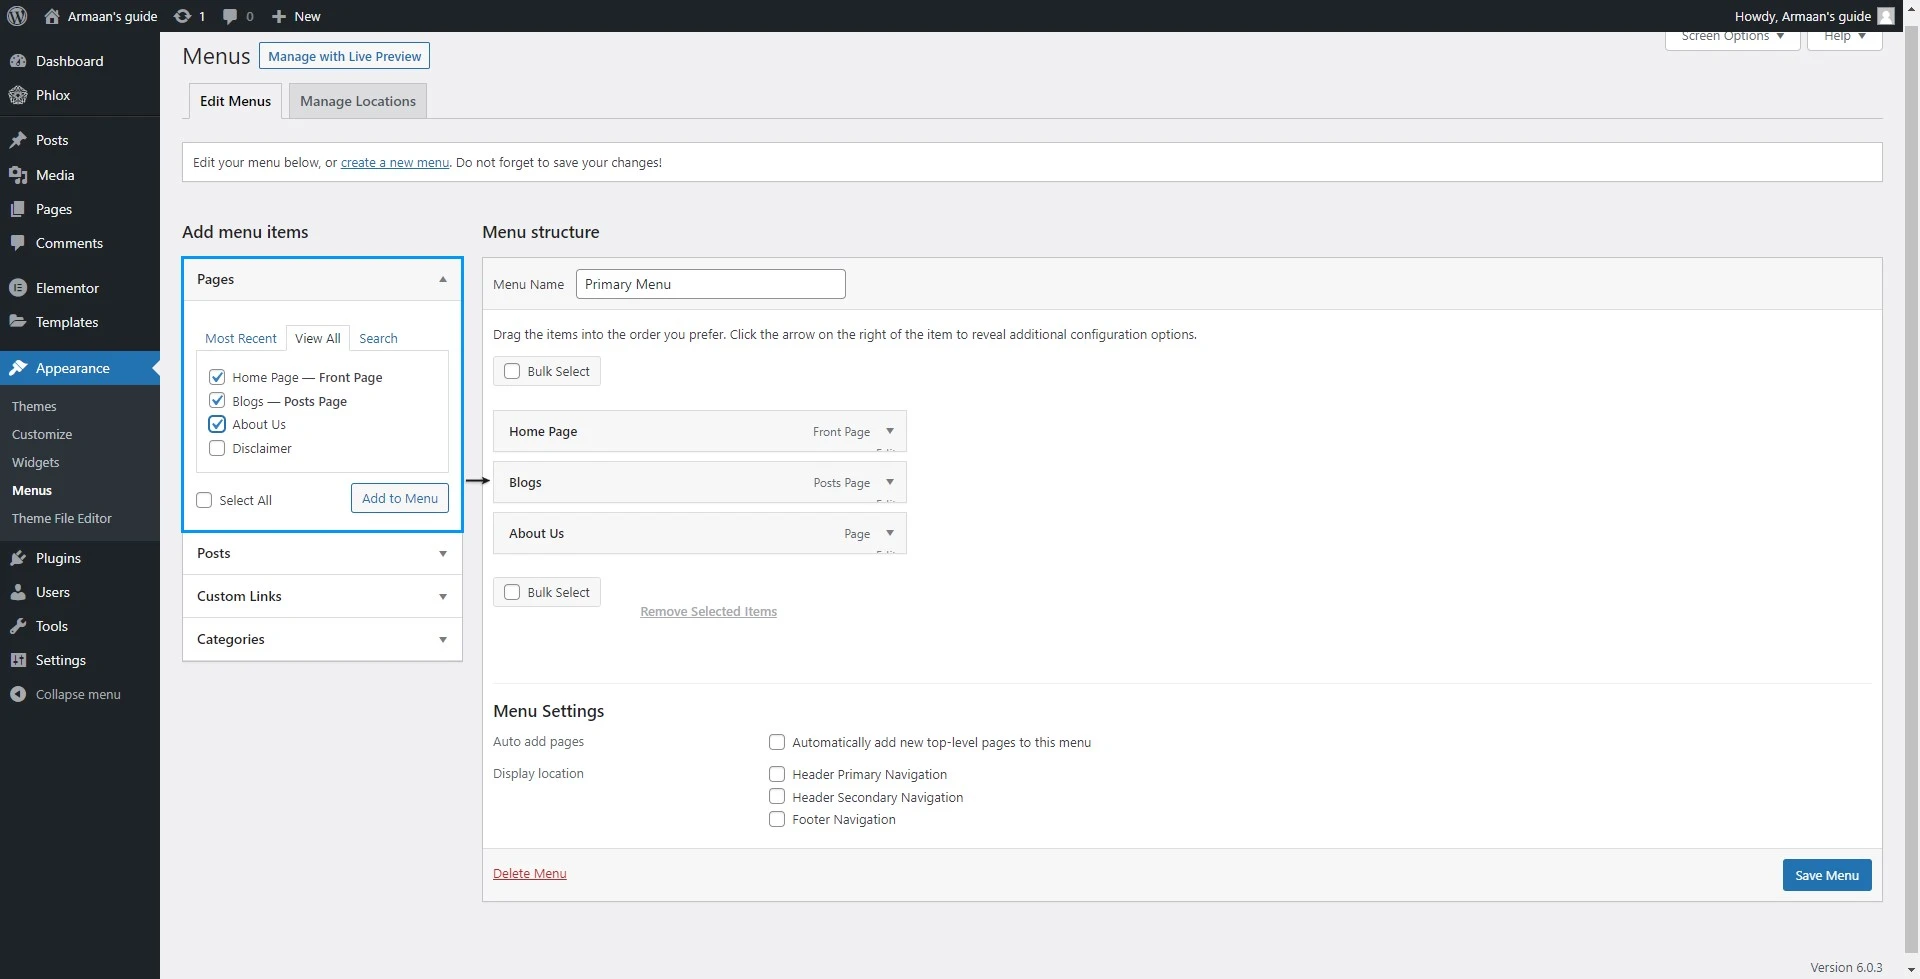
Following that, you can select whatever pages you wish to include in the menu. To begin, select the ‘View All‘ option to see all of your site’s pages. Then, mark the box next to each of the pages you wish to include in your menu and select the ‘Add to Menu‘ button.
After you’ve added your pages, you could move them around by dragging and dropping them. You can reorganize them as per your preference.
How To Create A Menu In WordPress: Categories In WordPress Menu
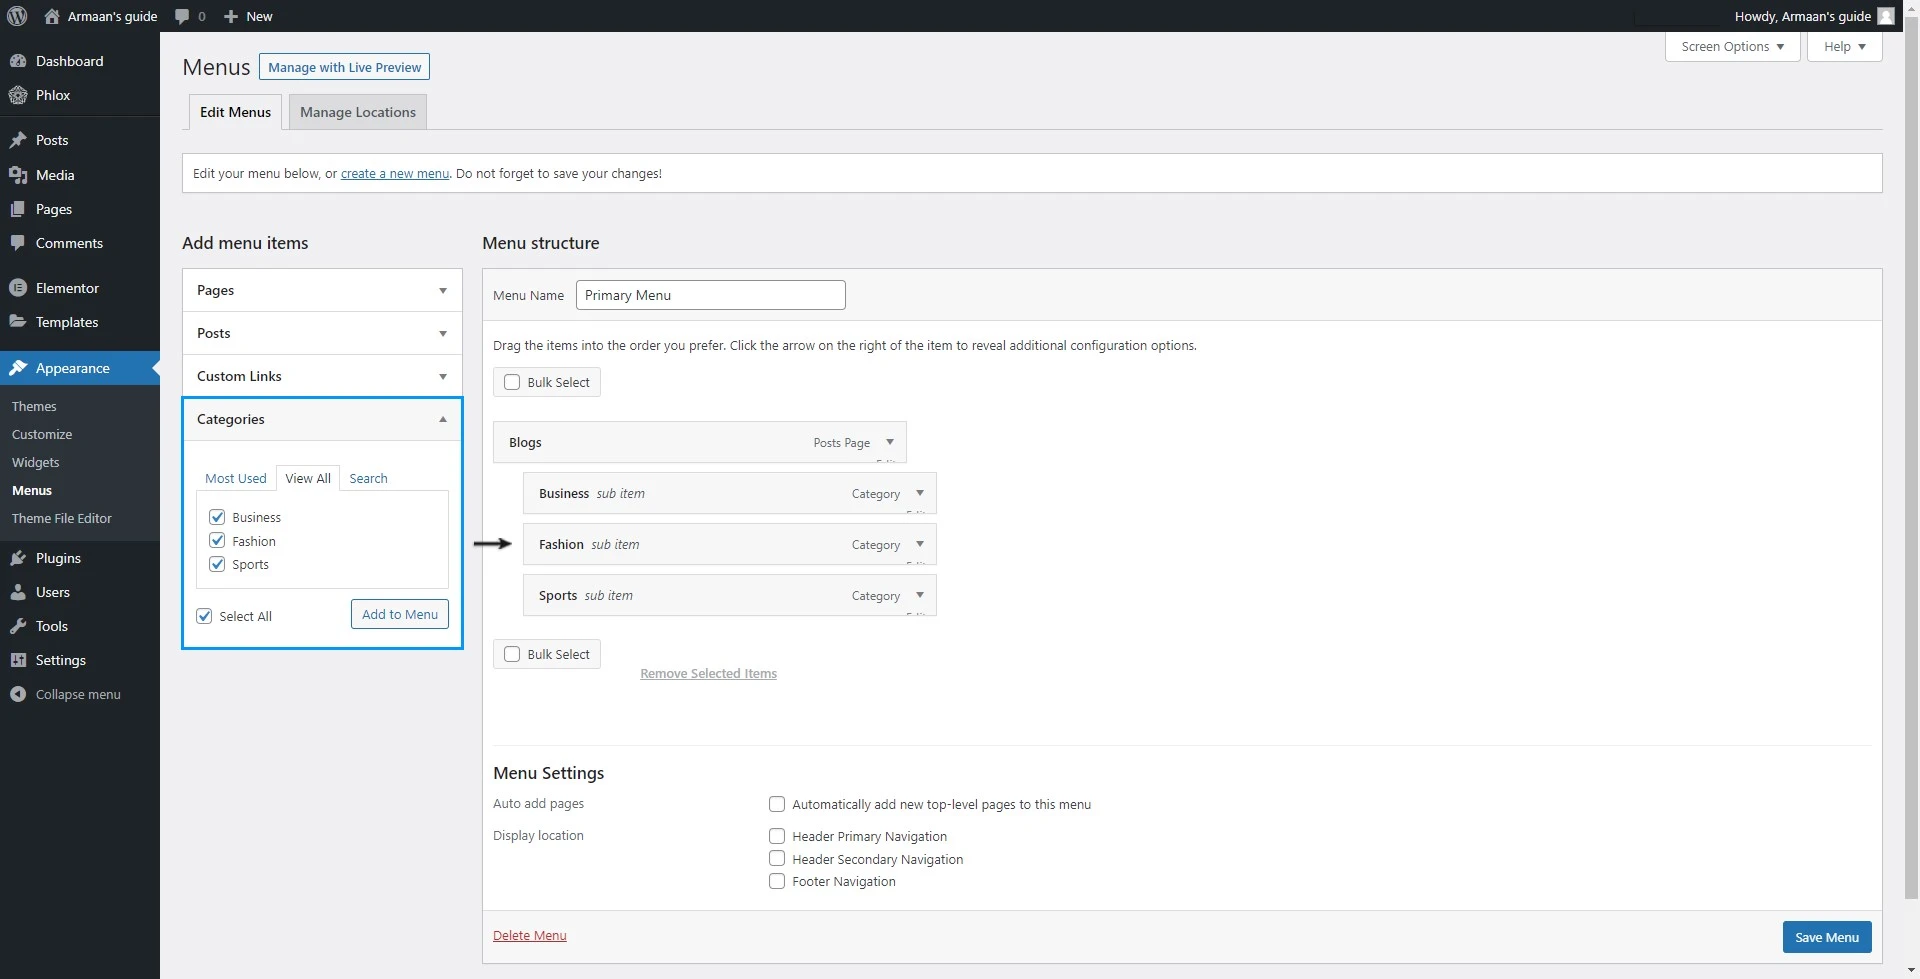
If you use WordPress to run a blog, news, or magazine website, you should consider including your post categories in your WordPress menu.
By selecting the Categories option on the left side of the menus page, you can quickly add categories to your menu. To see all of your categories, you may need to select the ‘View All‘ button. Now choose the categories you wish to include in the menu and click the ‘Add to Menu‘ button.
How To Create A Menu In WordPress: Custom Links In WordPress Menu
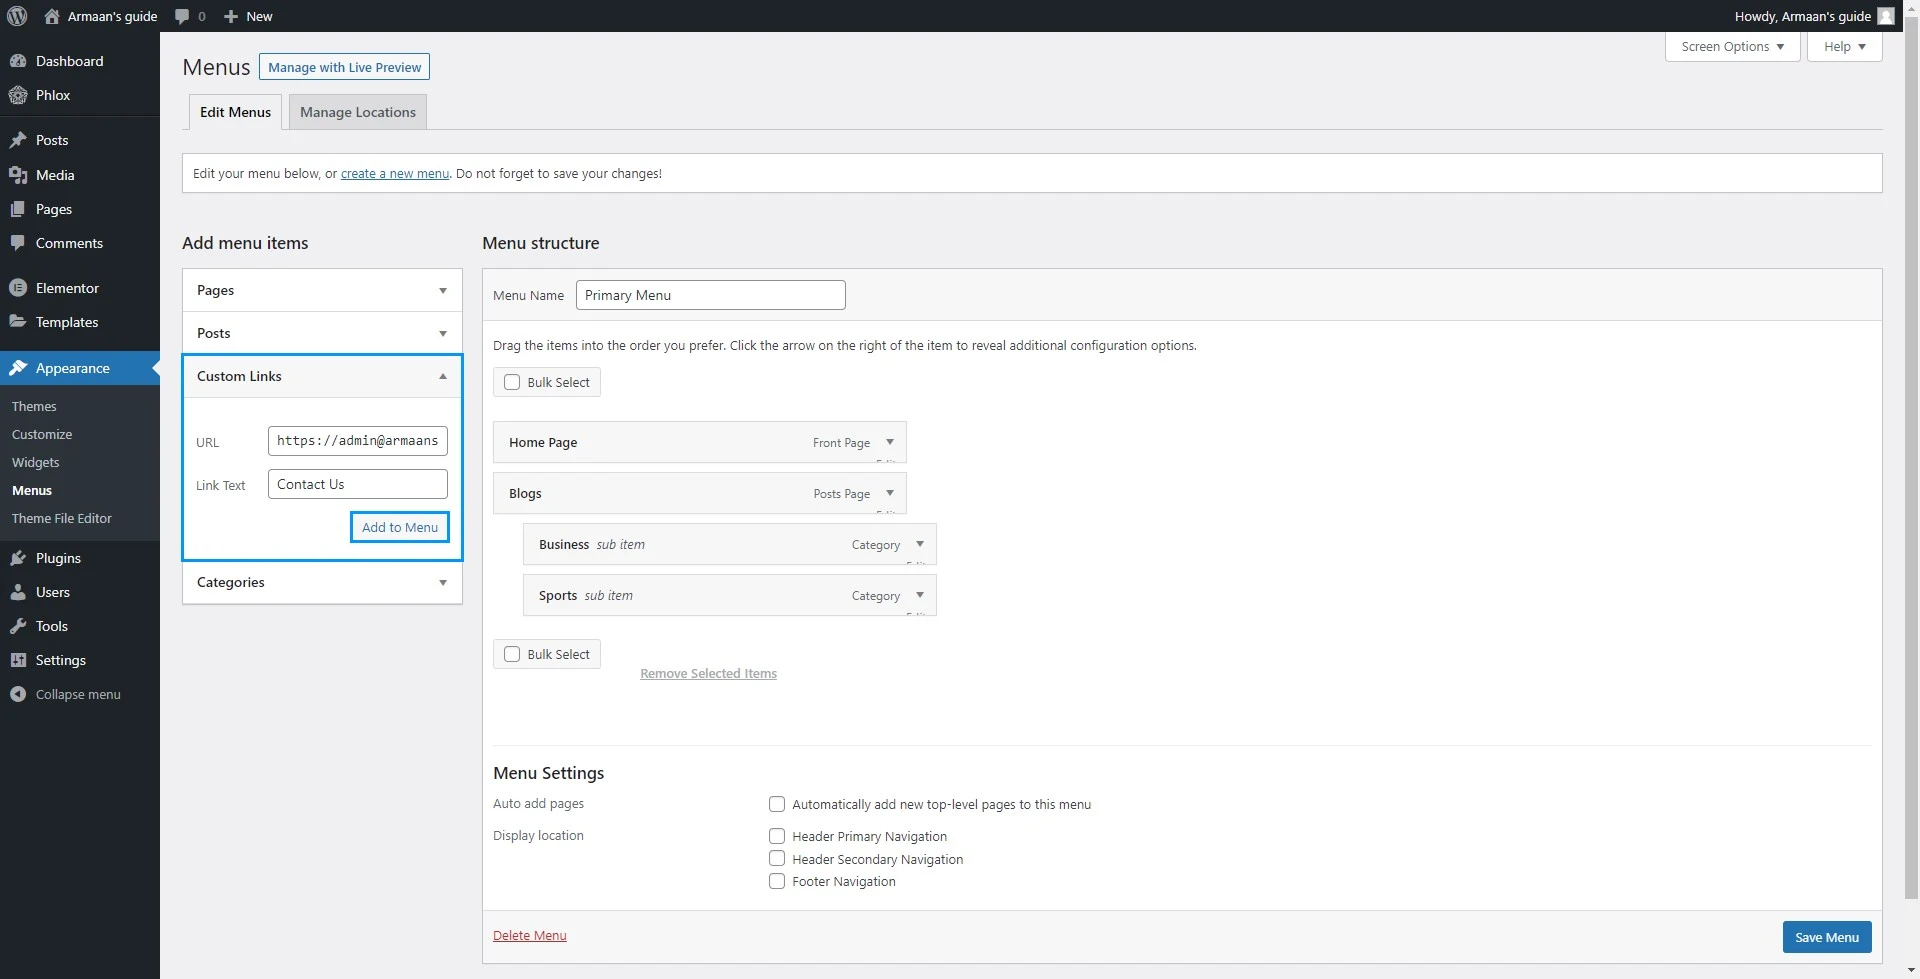
WordPress makes it simple to include custom links in your menu. It may be used to connect to your social media, contacts, and other websites. Simply Navigate to the ‘Custom Links‘ section and enter the link and the text you wish to appear in your menu and press the ‘Add to Menu‘ button.
How To Create A Menu In WordPress: Drop-Down Menus In WordPress
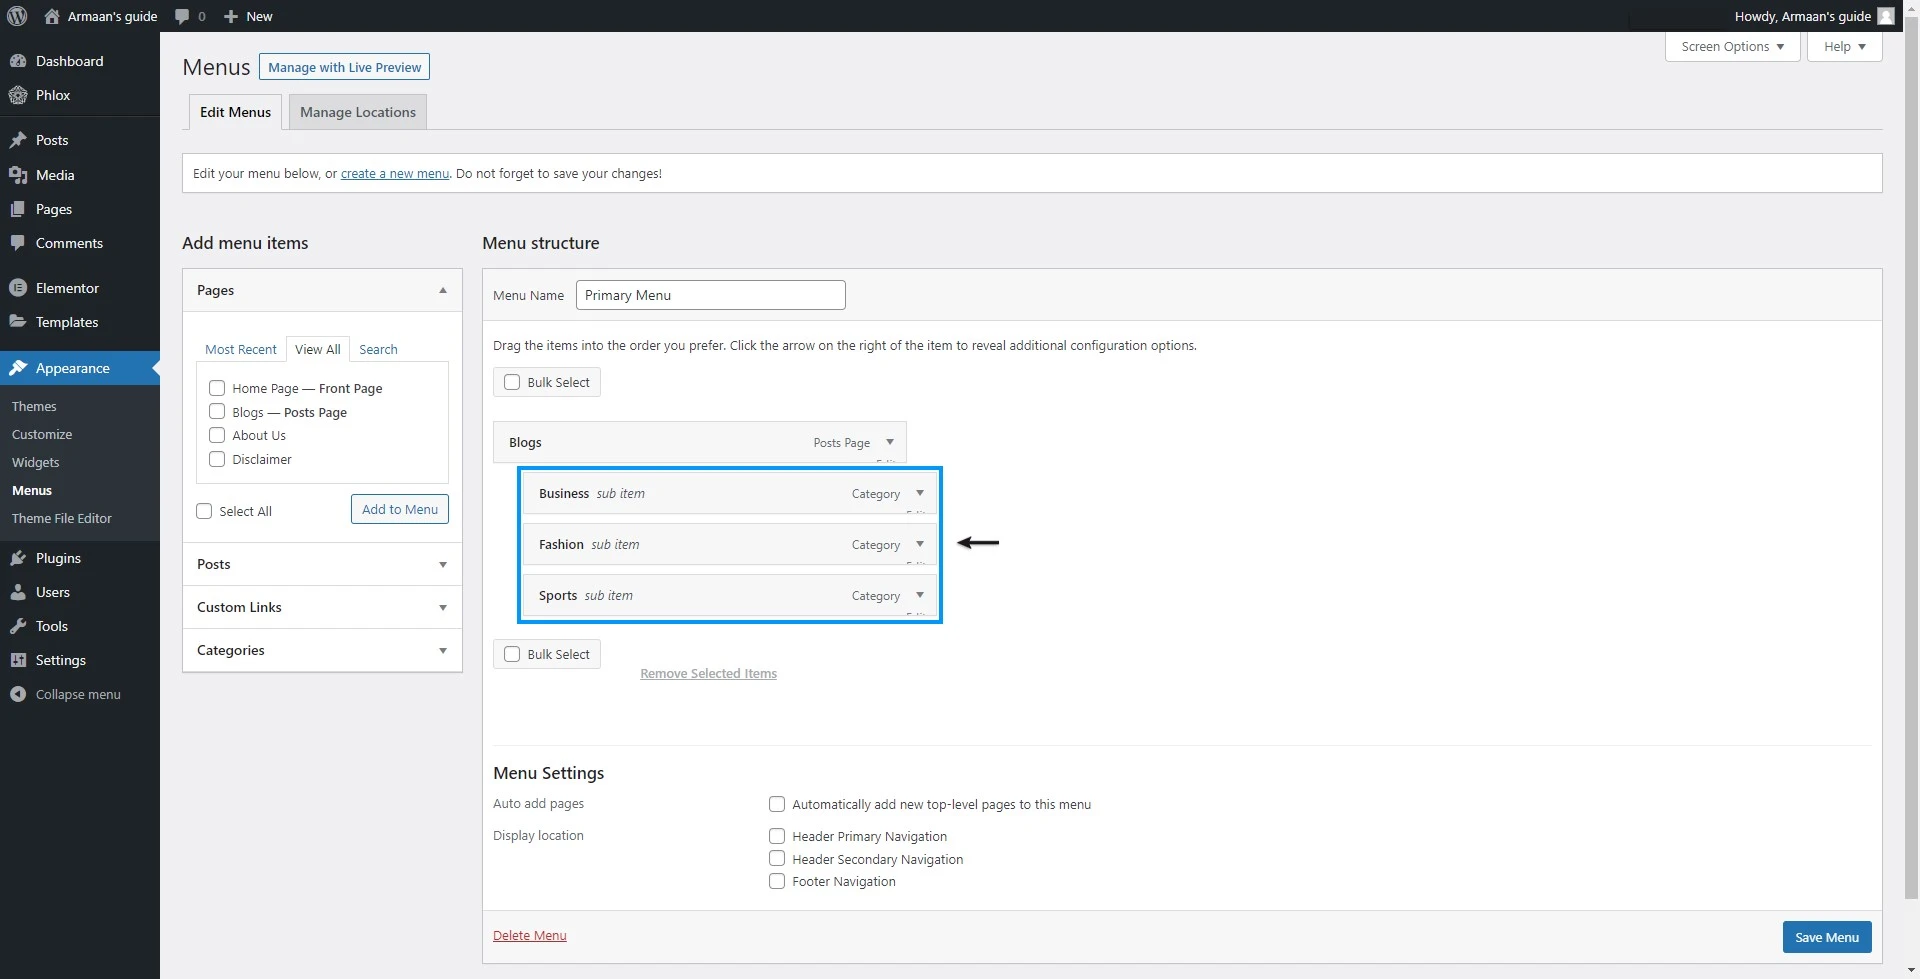
Drop-down menus are navigation menus that contain main and sub-menu items. When you hover your mouse over the main item, all of the sub-menu items display in a Drop-down manner.
Drag an item underneath the main item and then move it slightly to the right to create a submenu. You may even add numerous levels of dropdowns to your sub-menu so that it has its own Drop-down menu.
How To Create A Menu In WordPress: Assigning The Location Of Menu
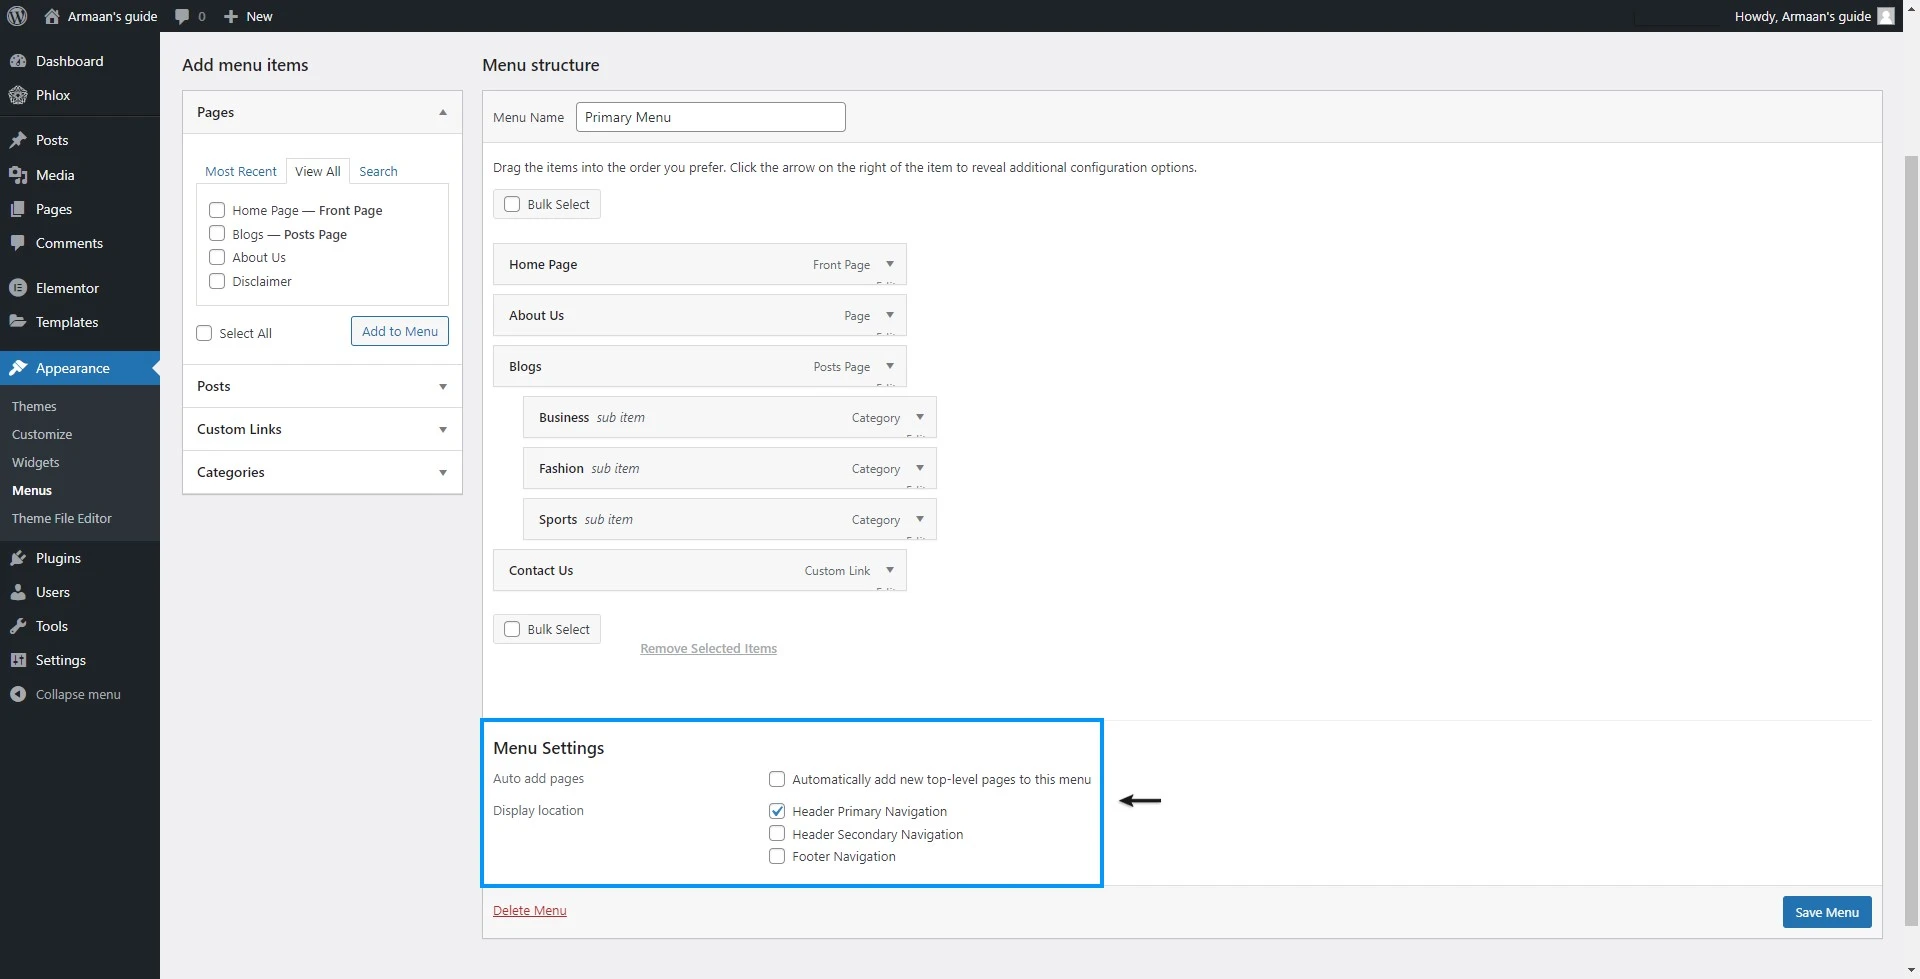
You must now specify where your menu will be shown. A Menu Settings area can be found beneath the menu builder. This is where you can change the location of your menu. Each theme supports a varied amount of menus, so you may have one or several menu positions depending on your theme. You must assign a menu to each place you intend to use; however, you can allocate the same menu to numerous locations or build separate menus for each location.
You’ve now successfully created a Menu in WordPress

